![]()
Tutorial :: The "Bump" Effect
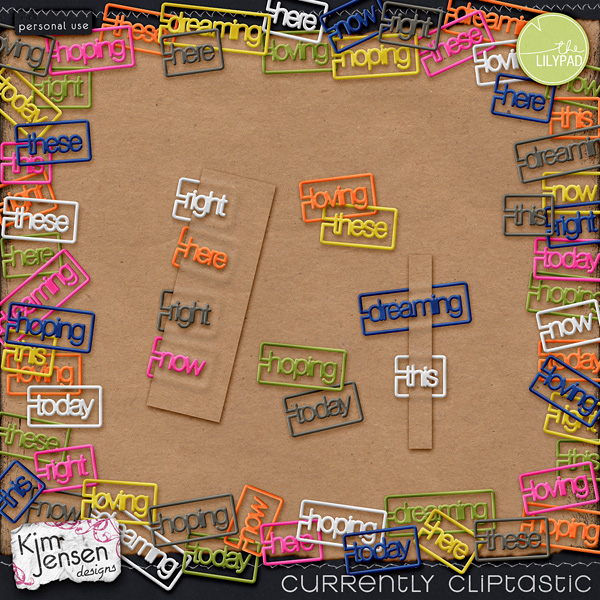
Hi all! I’ve had a few people ask about the “bump” effect in the preview of my Currently Cliptastic set that was part of The Lilypad’s recent blog hop, so I thought I’d write up a little tutorial. :)
This is the preview we’re talking about, and the way the paper strip appears to feed through the clips is what I will be attempting to explain. :) If you missed the hop, these clips (and others) are available in my shop :)
First a few disclaimers…
- Explaining/teaching is not my forte. I am very detail oriented and I tend to make things way more complicated than necessary. I will try my best to be clear, but please feel free to ask questions!
- Also… there are LOTS of different ways to do almost anything in Photoshop, which is one of the things I love most about it. This is just one way to get this look, and in no way am I claiming that it’s the “best”; it’s just the way I’ve always done it. :)
- I am using Photoshop CS6. Unfortunately, I have no clue as to what may be different or how to get the same result in Photoshop Elements or other programs. {My CT member, Melinda, has graciously provided alternative steps for a similar effect in PSE.}
So now on with the show!
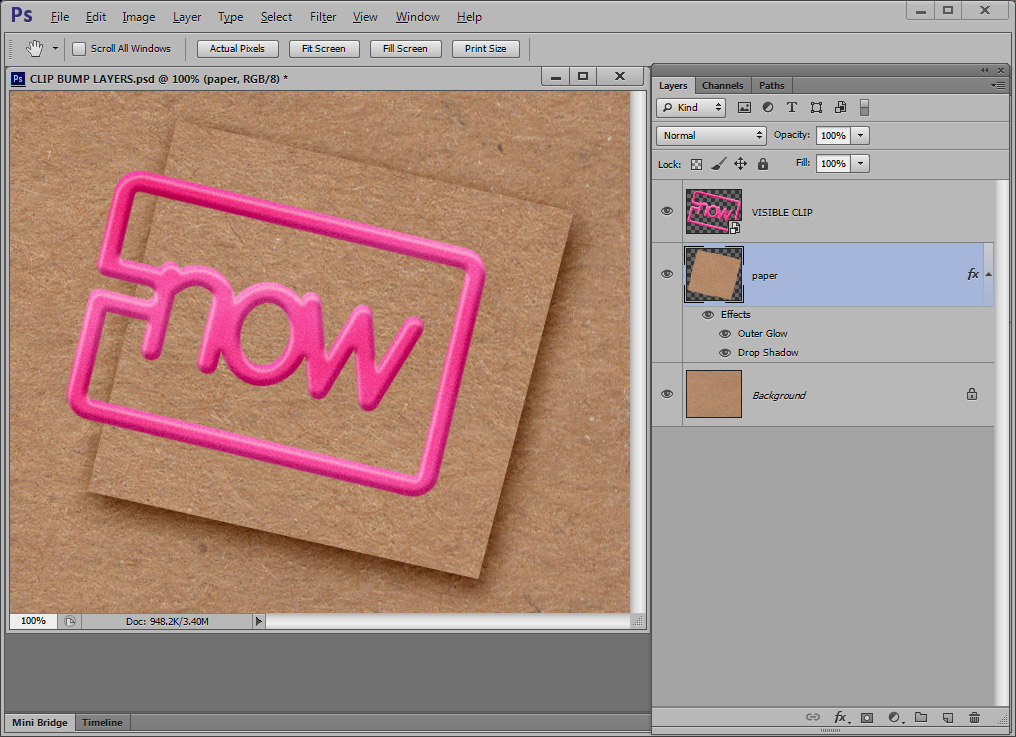
- We will begin with a scrap of paper with a shadow layer style applied (I also like to use an outer glow as part of my shadows) and the clip placed on the layer above it.
- Duplicate the clip layer.
Clip the lower copy to the paper scrap. (Layer > Create Clipping Mask)
Hide the lower clip layer for now by unchecking the eye next to it.
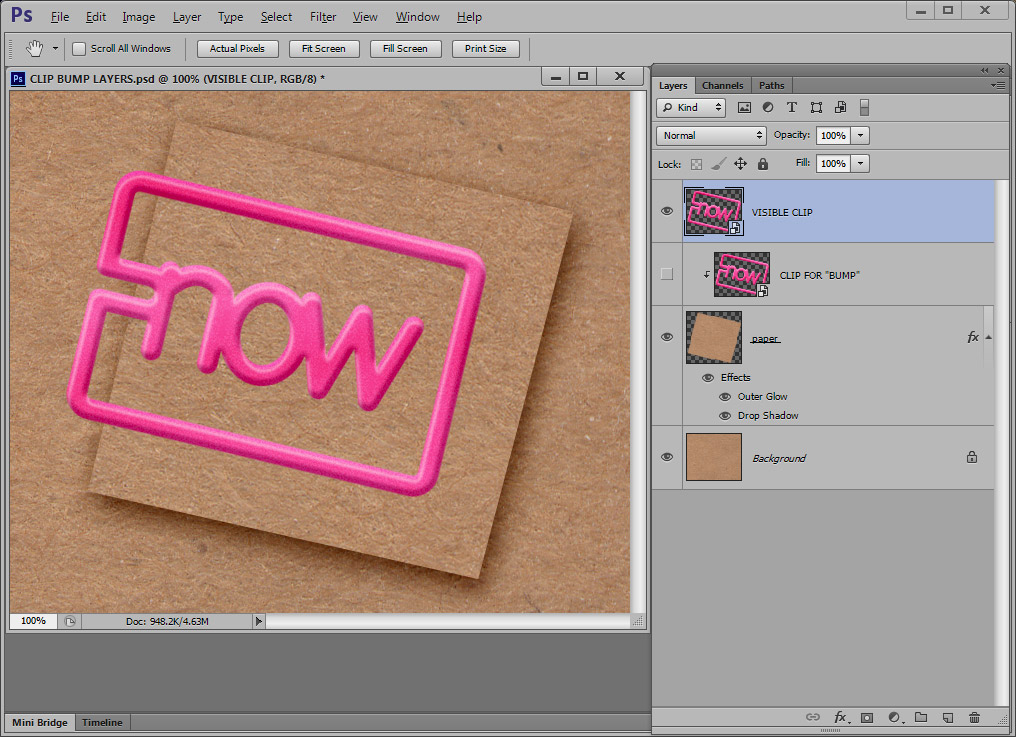
- Apply a closer/smaller shadow style to the top clip layer.
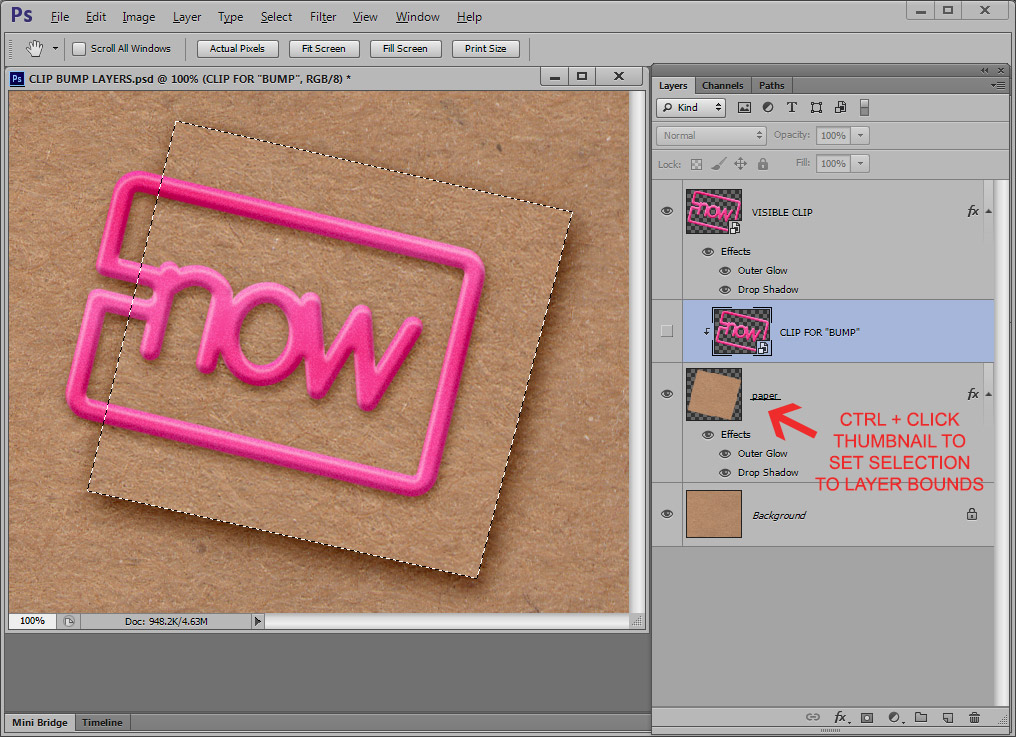
- Select the shape of the paper scrap by Control-clicking the thumbnail of the layer.
- Erase or mask out (by painting with black on the mask) the part of the clip that will be under the paper.
I use masks because that’s how I roll, but erasing will give you the same result.
The selection will keep you from erasing the clip beyond the edge of the paper and give you a clean edge.
Deselect (Ctrl+D) once you have that done.
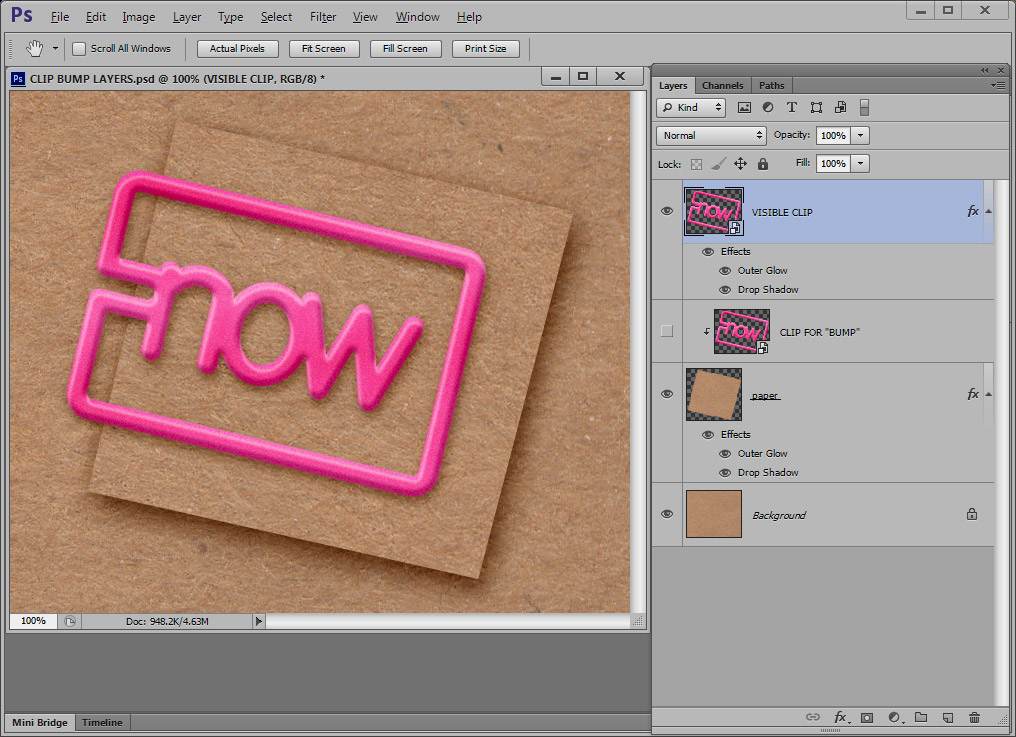
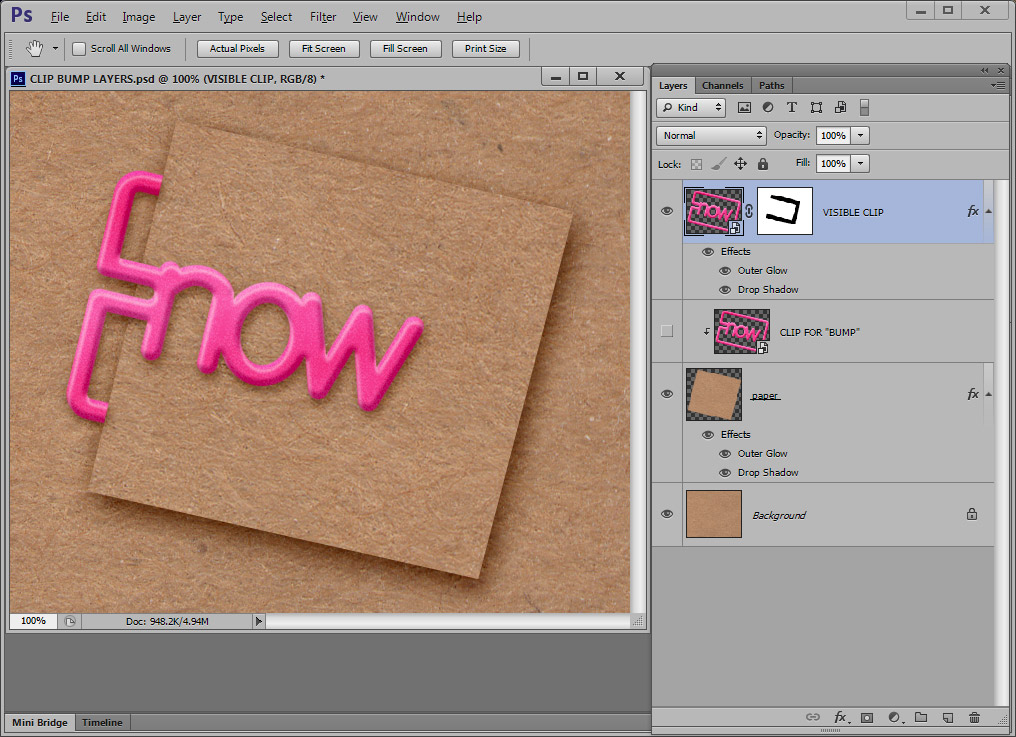
- Here comes the bump!
Turn on the visibility of the lower clip layer.
This time mask/erase so that you are left with only the part under the paper and a little beyond the edge of the paper.
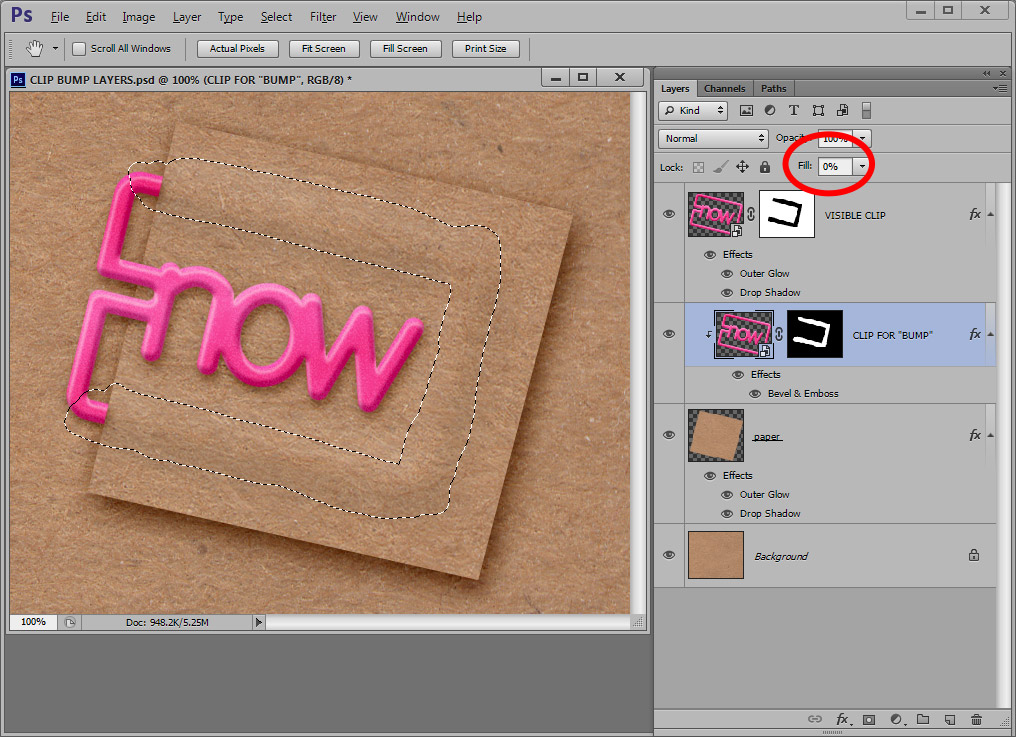
Set the layer Fill of the lower clip layer to 0%. This will allow the layer style to show, while the layer itself is transparent.
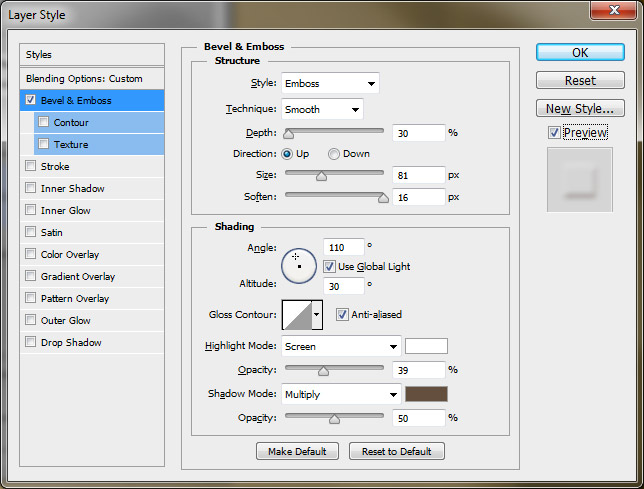
Apply an Emboss layer style to the layer. (My settings below.)
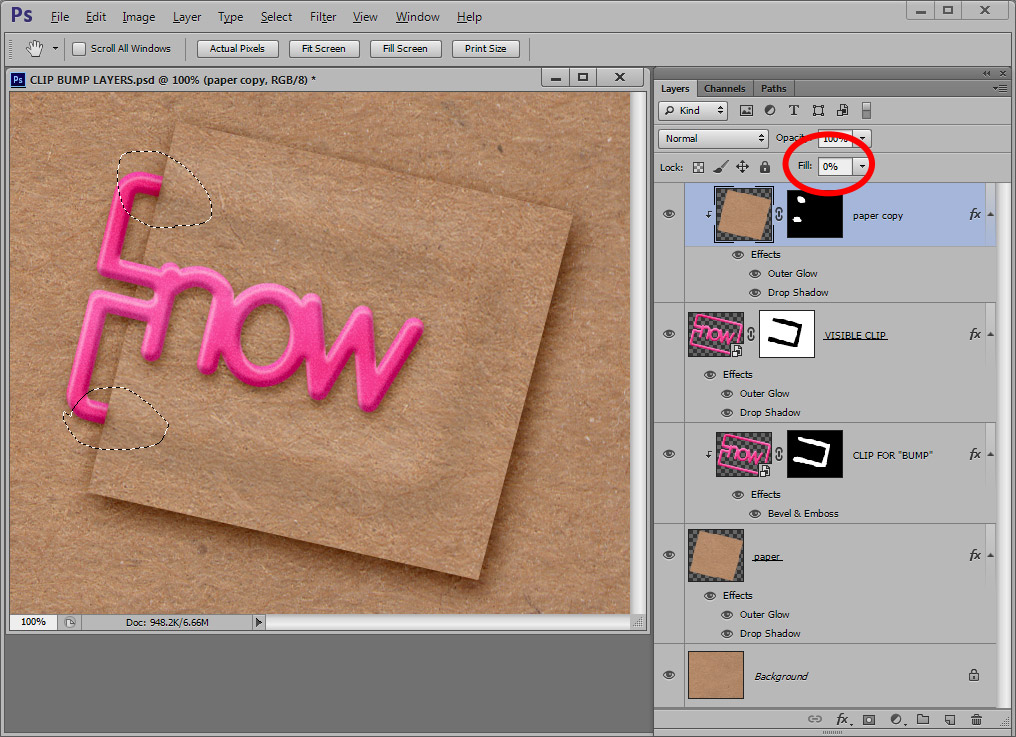
- That’s pretty close to the finished look, but I have one more really tiny detail that I add – a shadow on the edge of the clip where it crosses under the paper.
- Duplicate the paper scrap layer and drag it up above the top clip layer.
- Mask or erase so that only the paper in the general area where it crosses over the clip remains. (See "marching ants" selection below.) We don’t want the shadow to fall on any of the “above paper” part of the clip.
- Clip the paper copy to the top clip. (Was that confusing enough?)
- Reduce the fill of that paper copy layer to 0% as well.
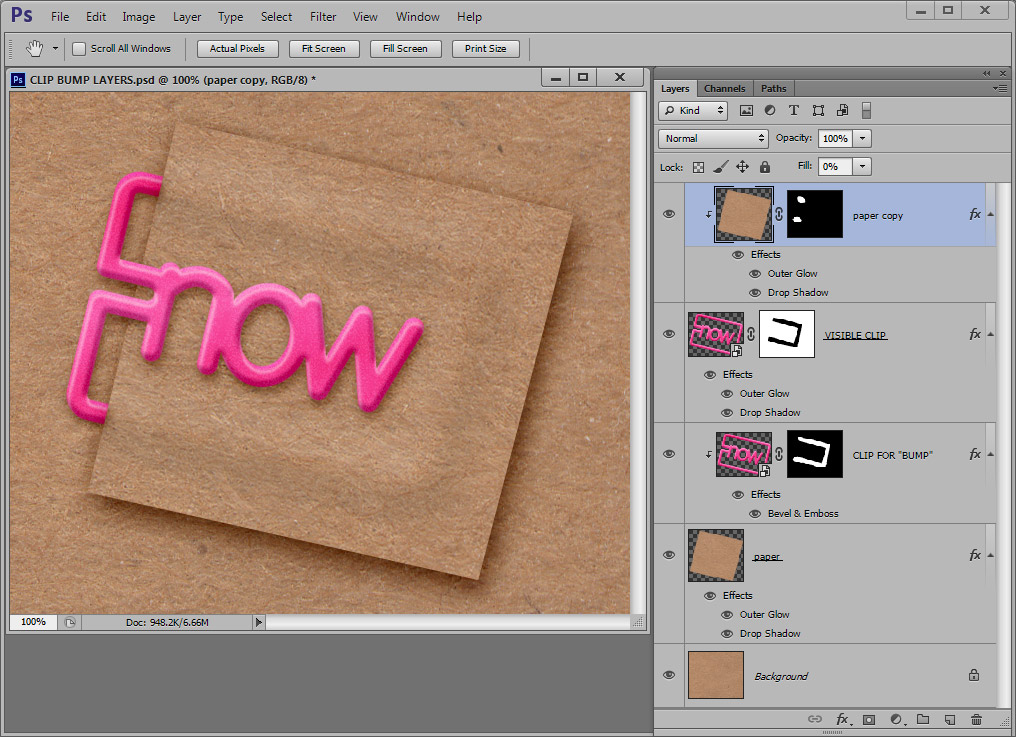
- Depending on your shadow settings, you may need to adjust the shadow to be smaller, larger, or darker as well. Play around to find what you like. :)
- And this is the final result. If you mouse over the image, you will see what it looks like without the extra little shadow, mouse away to see with shadow. Very subtle. You can probably skip that whole extra shadow if you're not as obsessive as I am. ;)
Here are my settings for the Emboss.
Yours may need to be different depending on the color and weight of the paper, shape of the clip, etc. Play with your sliders! :)
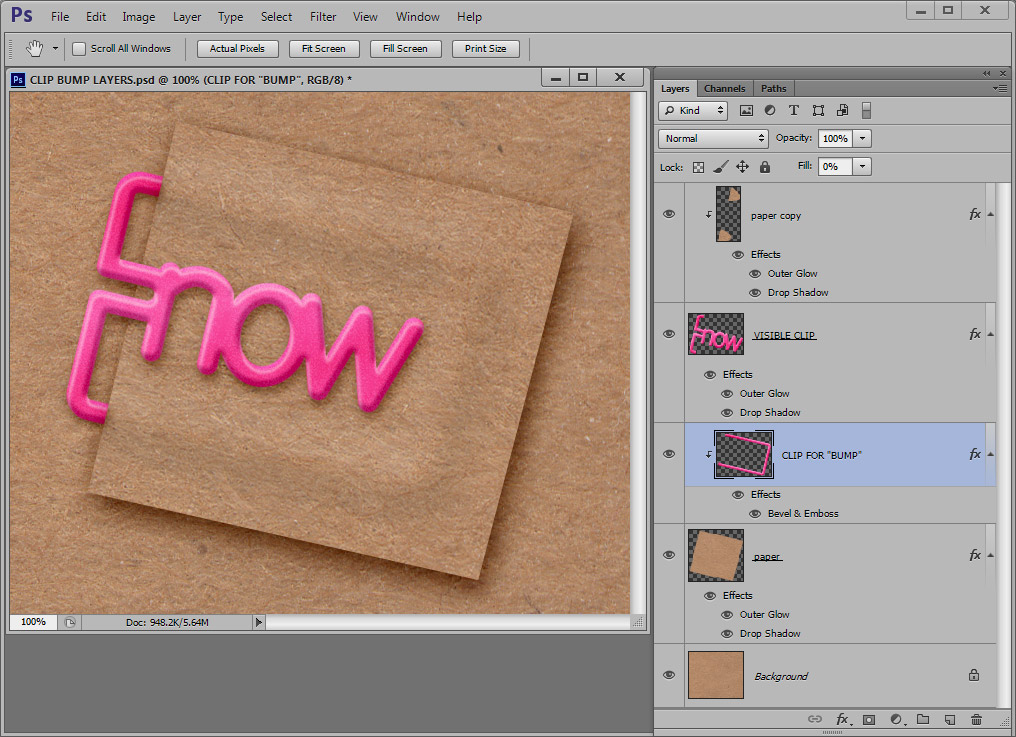
And just in case the masks are confusing anyone, this is what the final layer thumbnails would look like if I had just erased instead…
Hope that helps! Have fun, and feel free to click here to email me with questions or comments!
